This post contains affiliate links. All photos and opinions are mine and should not be used without written permission.
I decided to do something crazy, y’all. I know, I know, you’re already aware of how sometimes my projects can take on a life of their own and this latest one was no different.
Looking for the Right Doll House
You see, it all started with taking my kids to school. That’s innocent enough, right? Well, on the way to school one morning, I passed one of the many antique stores along the route. This is the same road I take every day and usually nothing exciting happens between our house and the school, but today I happened to stop at a light right next to one of the antique stores. Outside of this particular antique store, I saw a doll house. It was two stories tall with stately columns and sad looking wallpaper. Instantly, it took me back to my grandparents/ house where I played with my own doll house for hours on end. I loved pretending with the Barbies like we were in school or playing house and how fun it was. All the way to school that morning I couldn’t stop thinking about the dollhouse.
So, by no surprise, I decided to take a look at it on the way back home. I pulled up to the store and there it sat among the other old, forgotten items. The store was closed, but at least I could walk up to it and give it a better look. I gave it a once over and concluded it was going to need some TLC, but I could manage it. And then I saw the price tag. $90. Nope. Not happening. For me to completely overhaul the little house, I was not going to pay anywhere near $90 for the thing.
So I left the store that day empty handed, but it got me thinking…I wonder if I could find one elsewhere. I started my search online. Pottery barn had an adorable one for $450. No thank you.


Just the Right Size
Amazon had some good ones as well that were reasonably priced, but I wanted one with some character to it. I wanted a house that had a story. So I looked where any person goes looking for a story – Facebook. I didn’t set my hopes to high looking on Facebook for such a specific doll house. After all, most doll houses these days are plastic and generic looking. But after a few hours of searching, I found this house in a post among a lot of children’s toys.
The items had been posted a week earlier, so I wasn’t sure if it was even available still, but I contacted the poster anyway. I was in luck! The doll house was still available and I could go get it that day. Best part – it was $40!
That afternoon, I met 86 year old Emma. If you were to picture a sweet little old lady, this would be her. Emma told me how her husband had lovingly put together the home before he got Alzheimer’s. Emma herself was downsizing from their family home and I could tell it hurt Emma to sell that little house. She was so excited that a “young family” was going to give her late husband’s little house a new life and that someone could get some joy out of it instead of it just sitting in her garage.
I love that this little house has a backstory. That beats buying a plastic house at the store any day!
So after getting it home, the work began. There were broken pieces, missing pieces, scratched paint, glue drips, you name it. It took months, y’all. Here’s the overview of how this little house got it’s new life and the finished (for now) product.
Demo Day
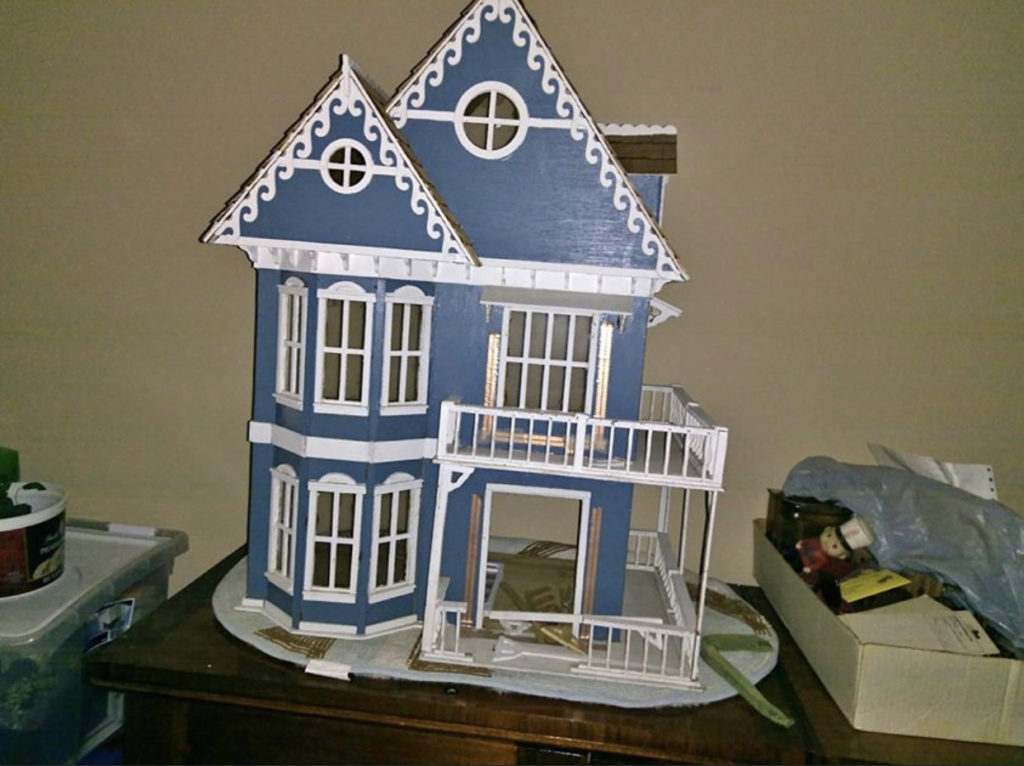
Emma’s husband did a great job putting this little house together from just pieces. You can tell he had done this many times before. However, there were still key pieces that were missing, and other parts of the home that just didn’t fit right.
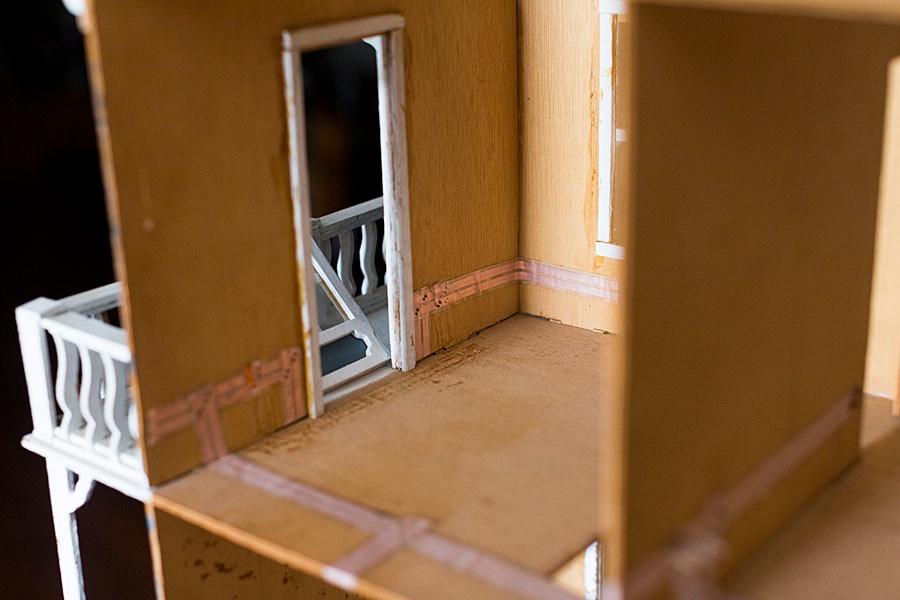
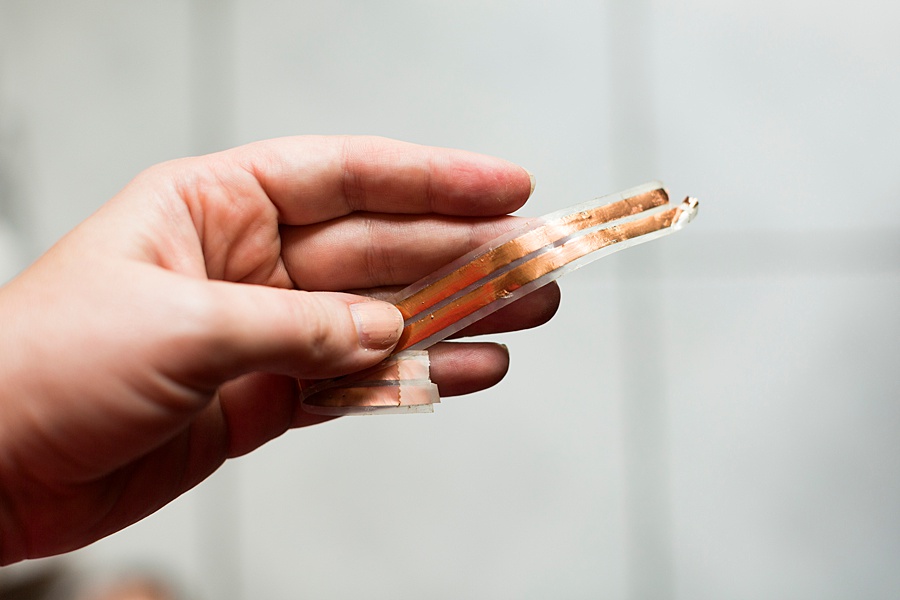
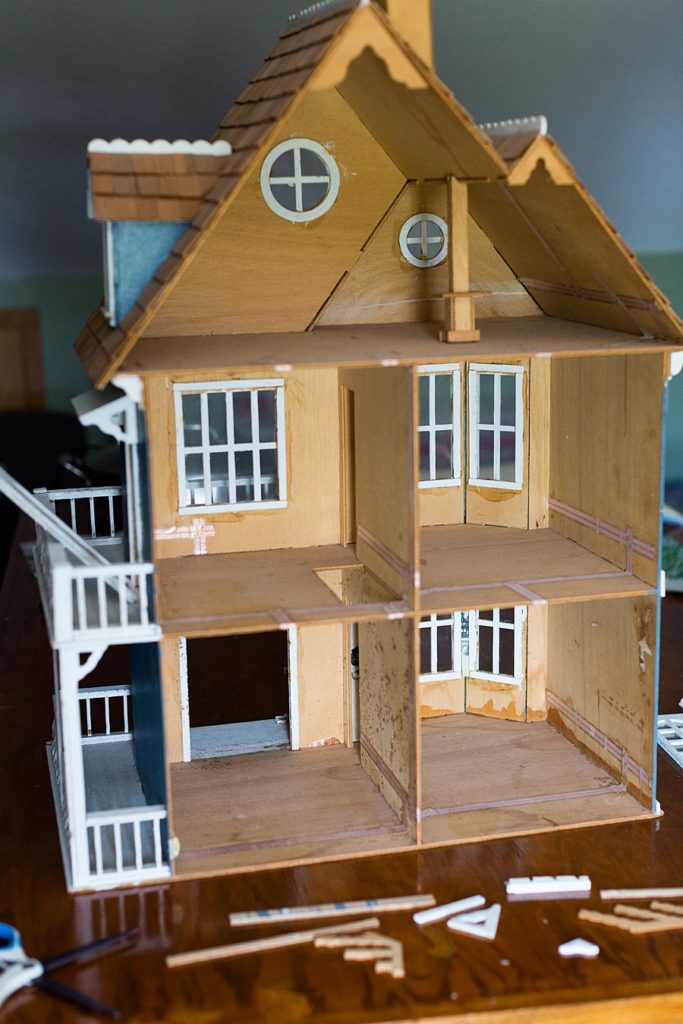
To begin the process, I had to get it to the bare bones. The original owner had wired the house for electricity. Before starting this project, I didn’t even know that way a thing! But since I don’t know the first thing about how to do that (and the ripples that it would cause in the wall paper would drive me nuts over time), I decided to take it all out. This was no small task because this electrical tape strip had the tiniest nails I’ve ever seen holding each strip down. Like I said, he knew his stuff and was building this house to last.

After I got all of the (many) electrical strips out, I sanded the entire house. I wanted a nice, clean surface for a new coat of paint and the perfectionist in me wouldn’t allow for a bubble or ripple anywhere – at least if I could help it.

After it was sanded inside and out, I gave it a good wipe down all over with a damp cloth. Just like in painting a regular-sized home, you have to have a clean surface to work with.
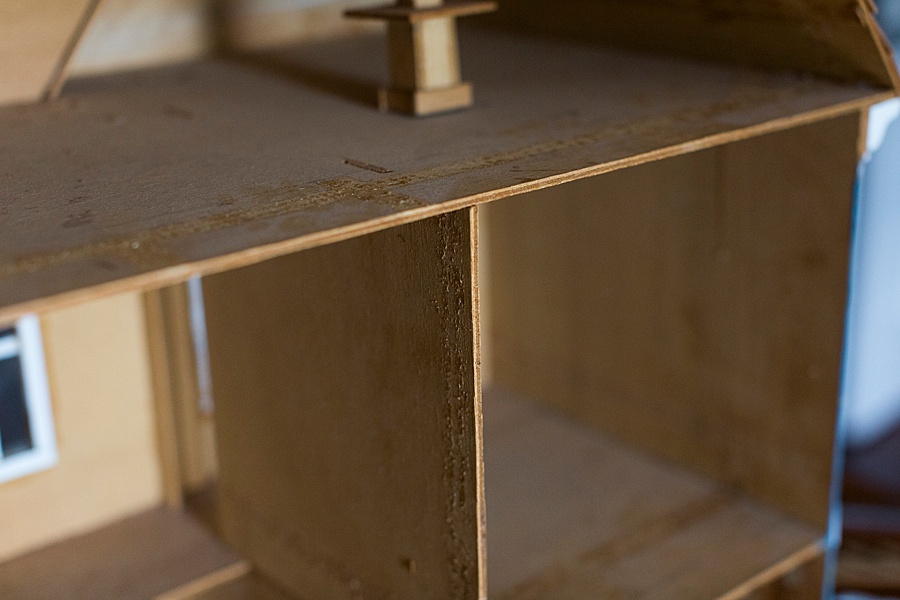
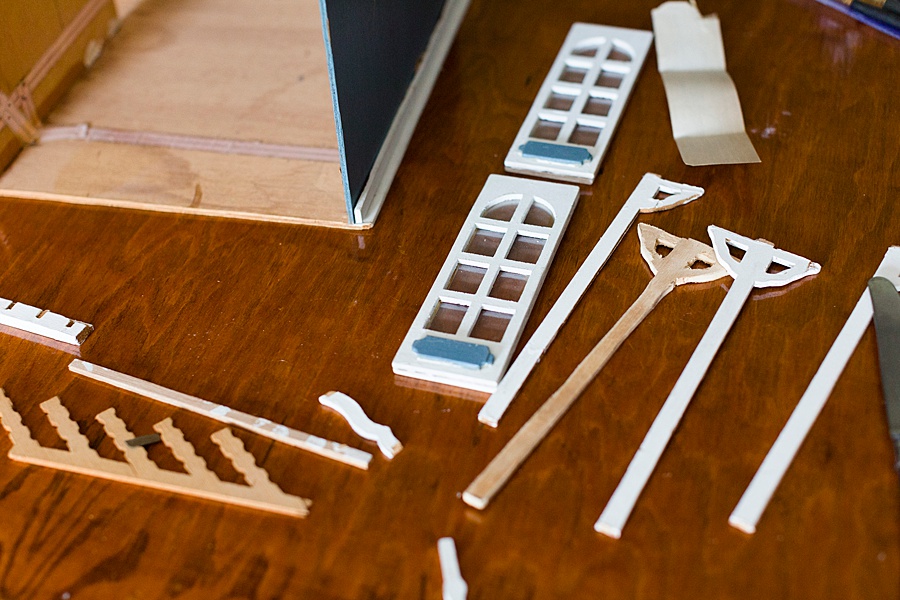
Lastly, I put together the riddle that was the missing/leftover pieces. Some of the pieces were a bit difficult to figure out where they went and others were much easier.
Time to Paint
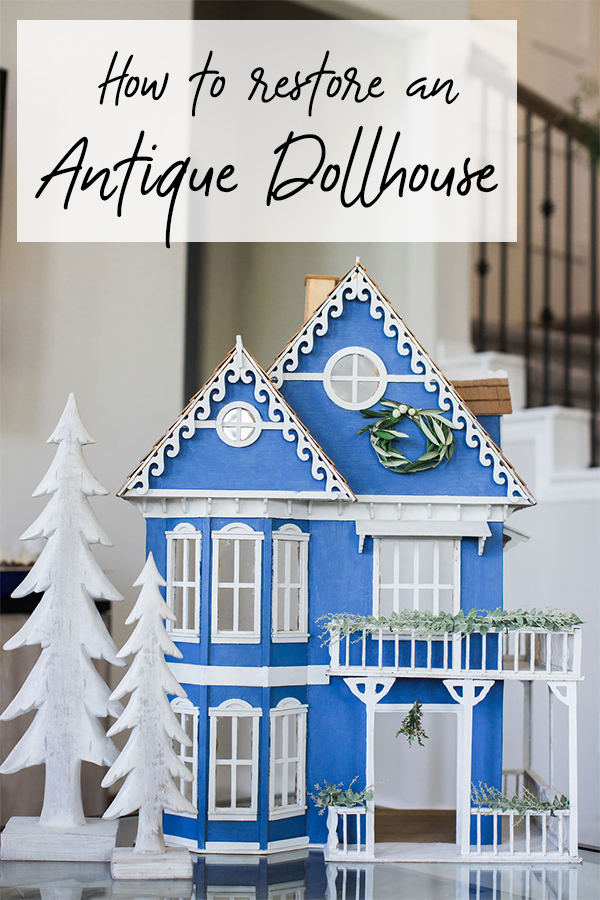
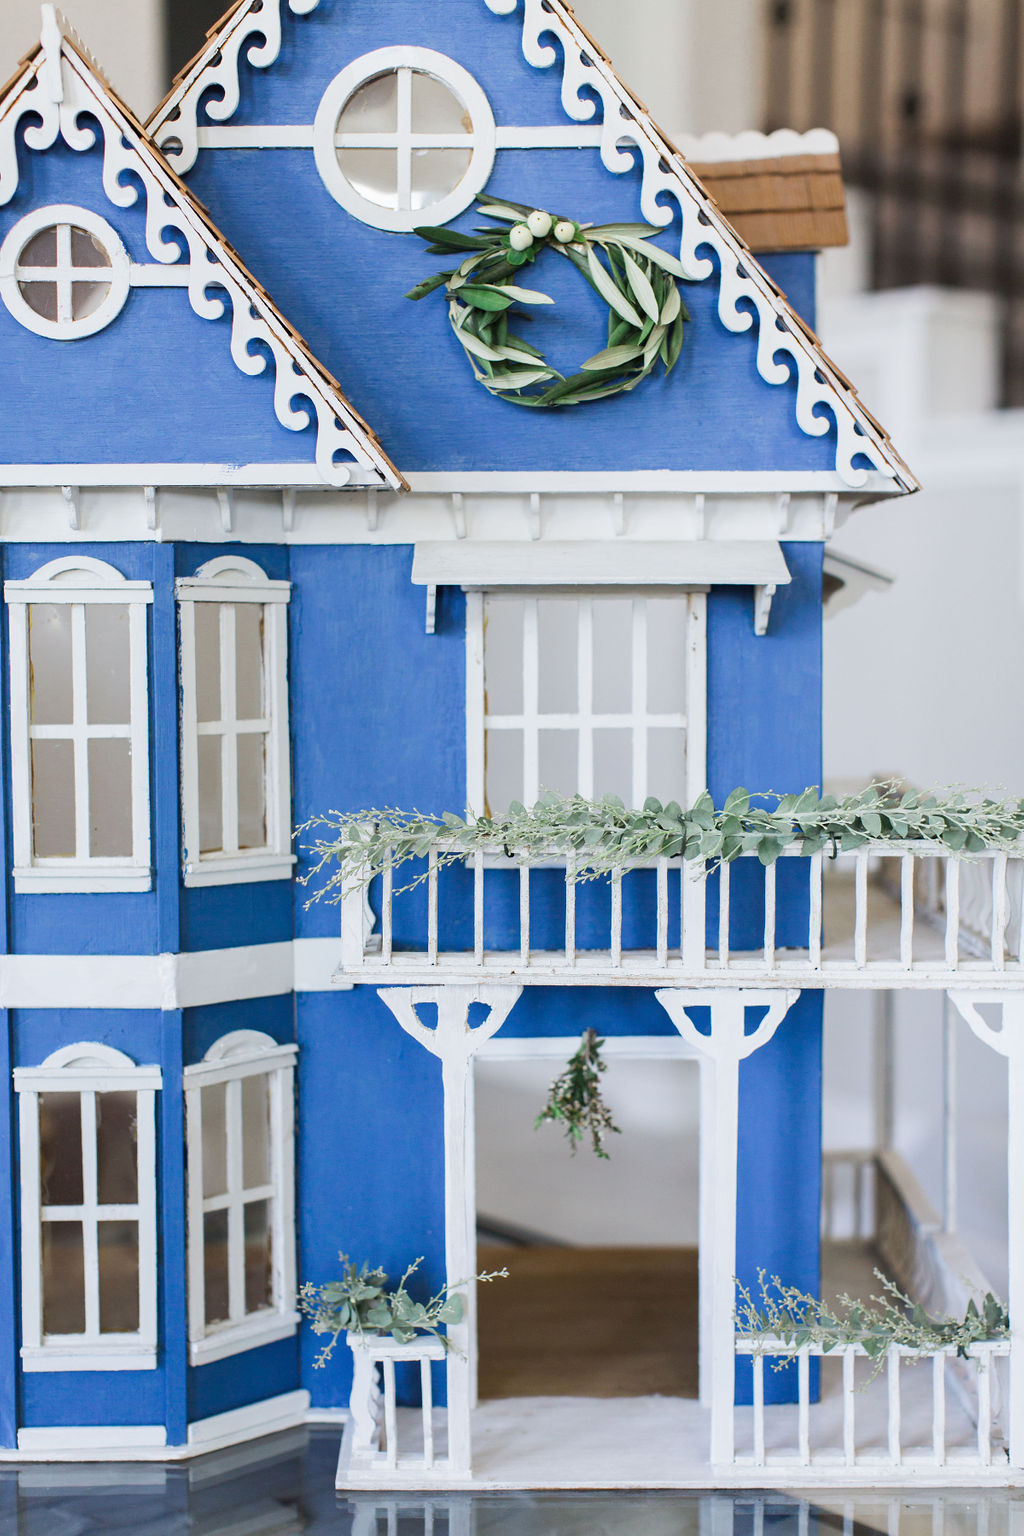
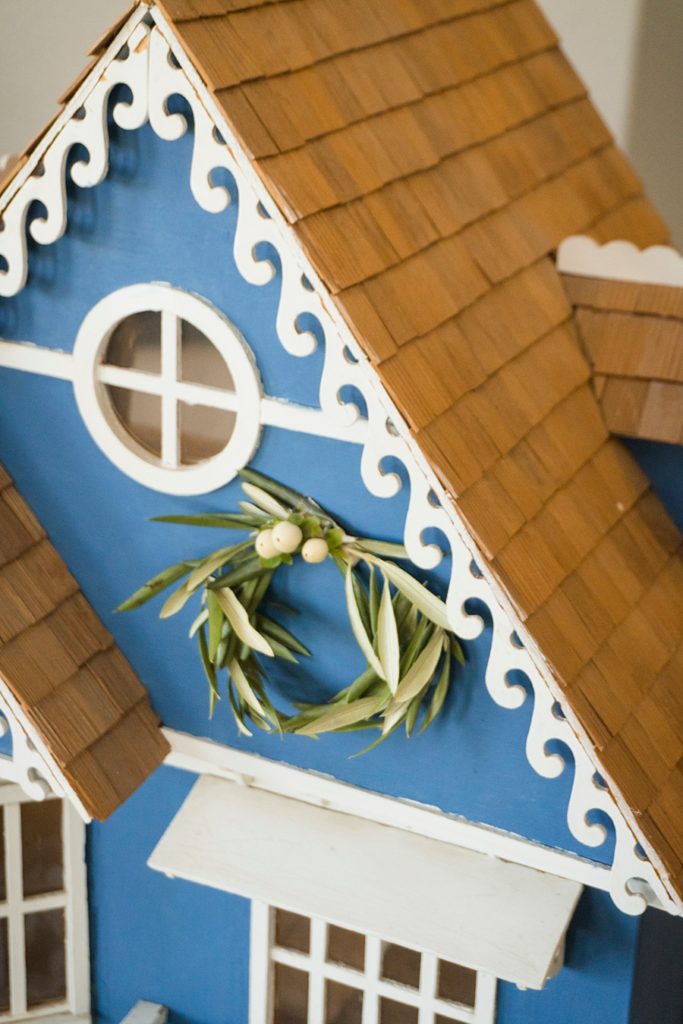
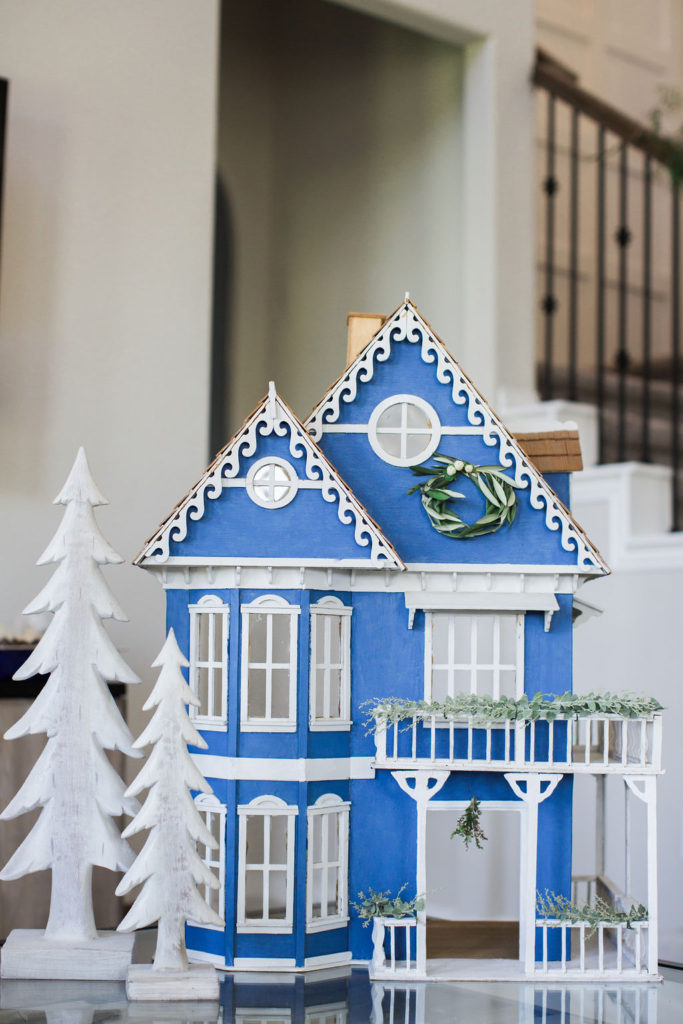
With the bones of the house complete, I started the tedious process of painting the outside. I started with the main blue color and then went back with a small brush to touch up the white trim. I loved the original blue color, so I wanted to get it as close to that as I could. Admittingly, my eyes crossed quite a few times while I was working on this and I wouldn’t recommend trying to sit down in one sitting and complete it.


I have a long way to go on the actual inside of the miniature house, but I’m really loving how it looks on the outside! And even more important, my daughter loved it!
If you’d like to see more tips like this, follow me on Pinterest!