Laundry is not an exciting task, y’all.
But that doesn’t mean you have to live with an ugly space. I’ve recently started working on updating my grandparents’ 1984 home. They lived in their home for the past 36 years, but now with them both out of the home, it’s time to get this house updated and brought into this century.
Ready to see the space? Let’s see what I started with.
The Before
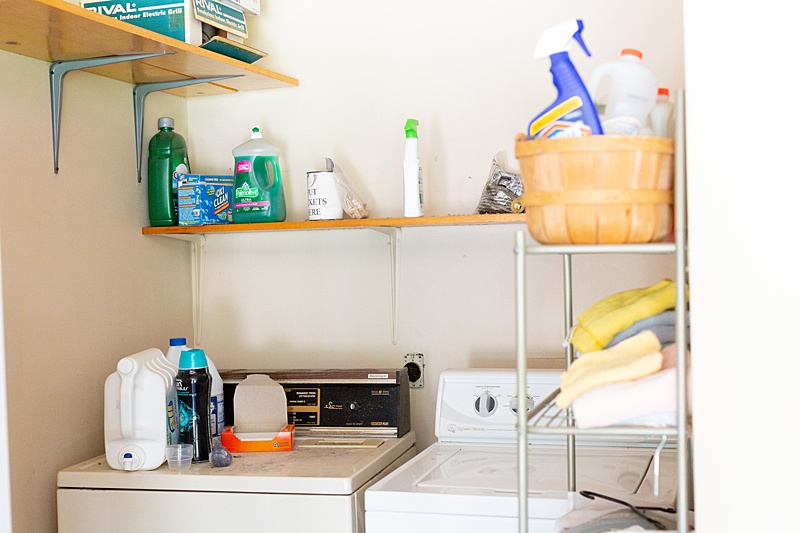
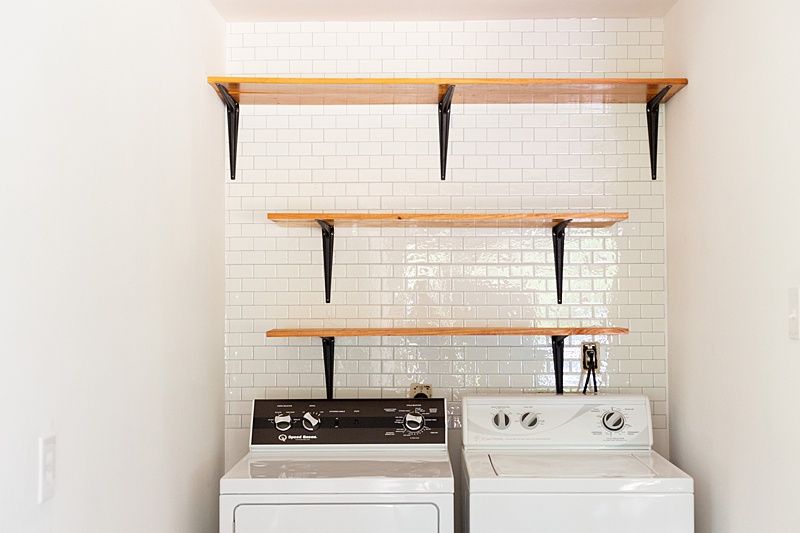
The laundry area is located in a little nook in the garage and while it did the job, it certainly was not a place that I wanted to spend time in. It had a freezer partially blocking area so it really felt dark and closed in.
Was the space was functional? Yes. Was it the best use of space for the area? No. There was shelving that didn’t make sense, bottles and items that were no longer used, and it just felt like a sad and forgotten space.
Paint
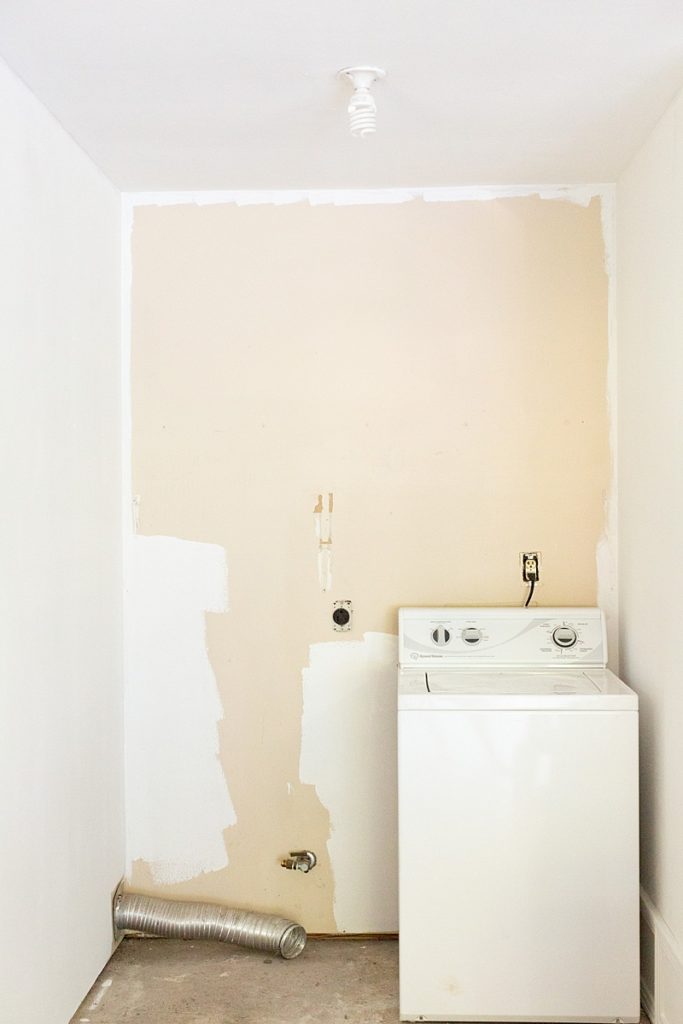
What started this project was that the dryer went out. Before a new one was delivered, I decided to paint the area to brighten it up a bit. Well, that led to removing shelves and reorganizing and pretty soon the area began taking on a whole new look.
One myth from the past was that using an off-white/beige paint color will hide dirt. False. It just made the space look dingy and sad (see the back wall in the above photo). So to start, I used Behr’s Interior Paint in the Polar Bear color for a clean, fresh look. I painted two coats with a roller to make it look clean and polished without any brushstrokes.
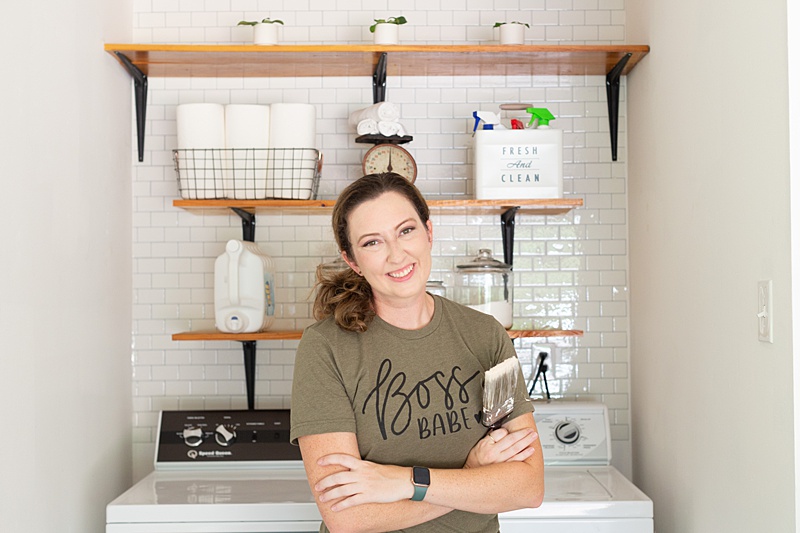
Tile
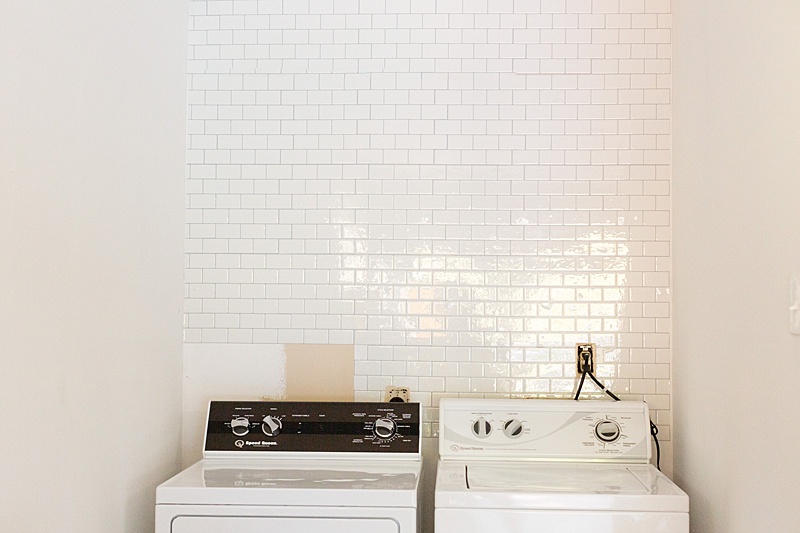
I was so excited about this part! The paint immediately brightened up the space, but the self-adhesive subway tile defined it. It gave the area such a presence and it no longer felt like an after thought. The interlocking adhesive tile was super easy to use too! It comes in sheets of about 1 foot by 1 foot, and you cut it easily with a box knife.
Shelving
For the shelving in this laundry area, I was able to reuse the shelves and brackets that were already there. I cut them into the right lengths and spray painted the brackets with a flat black paint. It’s amazing what a little spray paint can do to make something cheap look a little more polished and intentional.
I also purchased new outlets, outlet covers, and switches to match the bright white paint. The old plates and covers were dingy and needed to be updated.
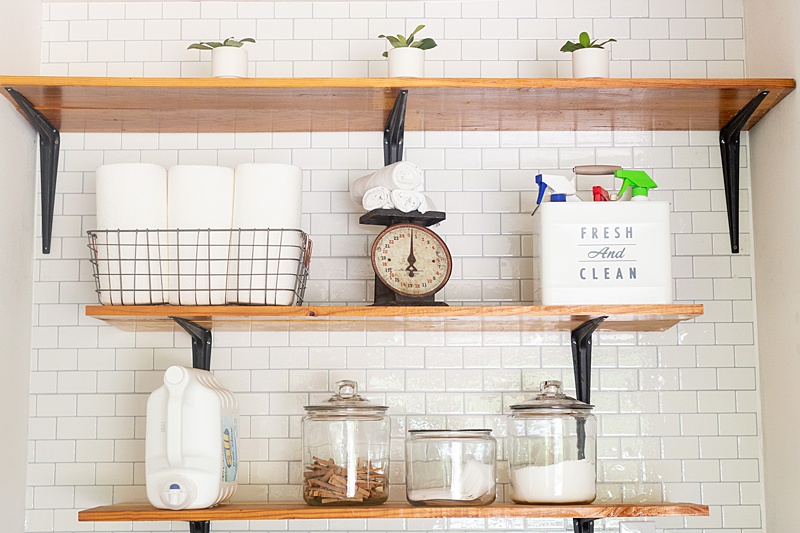
Decor
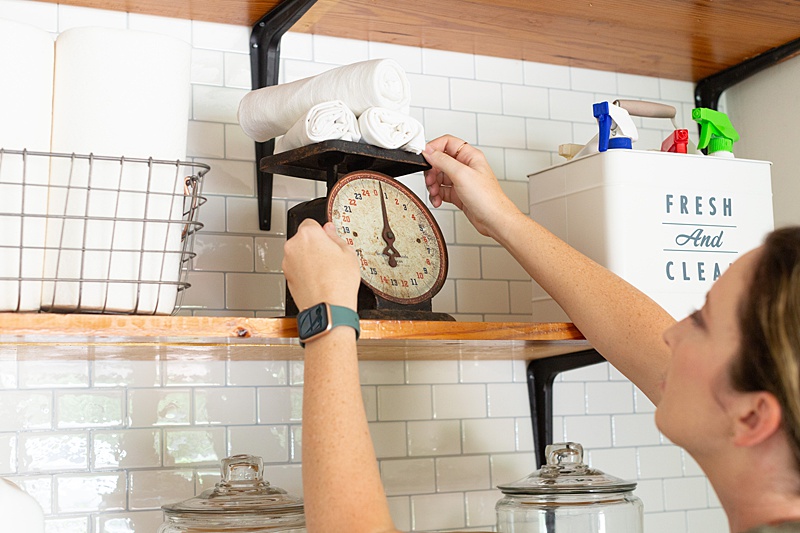
For the decor in this area, I wanted it to be functional and I didn’t want to spend a ton because, well, it’s a laundry room. So for the decor I found items my grandparents already owned and found items on Facebook Marketplace. Items like that antique scale and little planters were found in their home already, I just used them in a different capacity. I found the glass jars on Facebook Marketplace and the “Fresh and Clean” cleaning caddy was purchased at Walmart. I also reused an old shutter by turning it sideways and putting a sign I found at Walmart on it.

Breakdown of Cost
Gallon of Paint – $24.98
Self Adhesive Subway Tile – $128.07
Outlet, Outlet Cover, Light Switch, Light Plate – $2.50
Shelving $0
Spray Paint – $3.98
Cleaning Caddy- $11.88
Antique Scale – $0
Glass Jars – $4
Shutter $0
Laundry Sign – $17.26
TOTAL: $192.67
The Final Before/After
So here it is! The final look! I’m so excited with how this space turned out and I love how beautiful and functional it is.

If you’d like to see more tips like this, follow me on Facebook!