The Hurried Hostess

Inspired Eating & Traveling on a Budget

  • Home
    • DIY
    • Entertaining At Home
    • Marriage
    • Parenting
  • Recipes
    • Appetizers
    • Cocktails
    • Salads
    • Meals
    • Sides
    • Desserts
  • Travel
    • Texas
    • United States
    • Mexico
    • Europe
    • Traveling on a Budget
    • Traveling With Kids
  • About
    • Mission
    • Press
    • Contact
    • Subscribe
Appetizers ~ Desserts ~ Easter ~ Entertaining At Home ~ Recipes ~ Valentine's Day

Melt in Your Mouth Butter Mints

April 5, 2018

Share this:

  • Click to print (Opens in new window) Print
  • Tweet
Melt in Your Mouth Butter Mints

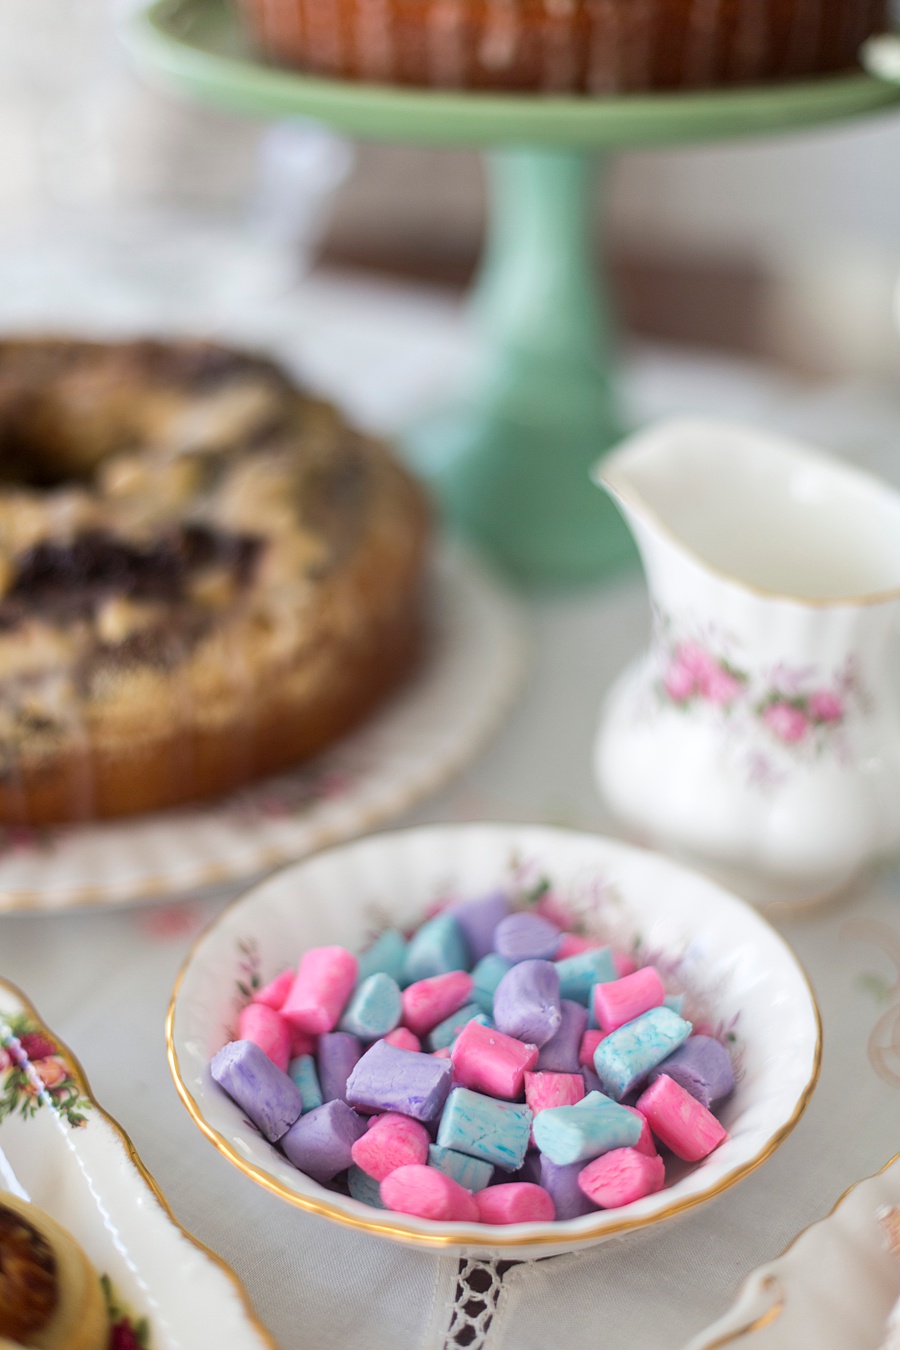
As a kid, I loved going to bridal showers and baby showers with my Mom. After all, I got to dress up and be one of the big girls for the day. Another great part was that they always served those melt in your mouth butter mints. Remember those? They were usually a mix of pale pastel colors and I would always load up my little plate with them. I wanted to make some for this Mother’s Day, so I thought I would share with you the recipe. I hope you get together with your Mom and make something that reminds you of your time together when you were younger. Time to get in the kitchen and create some memories!

Ingredients:

  • 4 ounces unsalted butter (at room temperature)
  • 4 cups powdered sugar (plus a little extra for the rolling process)
  • 1 tablespoon milk (or cream)
  • 1 teaspoon vanilla extract
  • 1/4 teaspoon mint extract
  • 1 pinch salt
  • optional: food coloring

Directions:

Step One. In a stand mixer, beat the butter on medium speed until creamy and smooth.

Step Two. And in 4 cups powdered sugar, milk, vanilla, salt, and mint. Mix everything on a low speed until everything is incorporated. After it’s combined, increase the speed to medium and beat until the texture is nice and smooth.

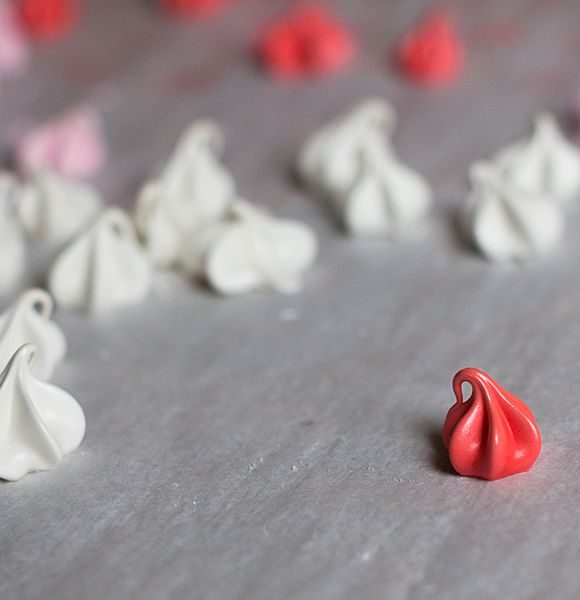
Step Three. Dust your work surface with powdered sugar. If you’d like to make different colored mints, divide your candy mixture into separate piles and work in a drop of food coloring to each one. The candy will darken as it hardens, so if you want a pastel color make sure to use barely any food coloring on it. You’ll also want to use gloves, as the food coloring will stick to your hands. Wrap the candy mixture in plastic wrap until you’re ready to shape it and use it. It will dry out pretty quickly otherwise.

Step Four. You can shape your candy in many different ways, but I’m a purist, so I like the tiny pillows look like the original candies I had so long ago looked like. How you make that look is to roll the candy into a long, thin cylinder (think like you’re making a snake out of playdough). You’ll want it to be about 1/4 ” thick. Using a sharp knife, cut the mixture every 1/2″ or so. After you’ve completed this step, transfer them to a baking sheet.

Step Five. Leave the baking sheet out overnight at room temperature. In the morning, they’re good to go in a plastic bag for save keeping (or, you know, in your mouth…).

Pro Tip: Instead of “tiny pillows, you could also make small balls, roll it out thinly and use cookie cutters to make cute shapes, or make thin disk-like shapes. The possibilities are endless!

If you’d like to see more recipes like this, follow me on Pinterest!

Share this:

  • Click to print (Opens in new window) Print
  • Tweet

Related Posts

Easy Rotisserie Chicken Enchiladas

Easy Rotisserie Chicken Enchiladas

Need a quick and easy weeknight meal that’s delicious? Try this this one out!

Light and Airy Meringue Kisses

Light and Airy Meringue Kisses

These light and airy meringue kisses are the perfect sweet treat to end a meal with or serve your guests at a party.

Ooey Gooey Microwave Caramels

Ooey Gooey Microwave Caramels

These super simple and delicious caramels will have you scraping every last drop out of the bowl!


Must Have Items and Menu for Hosting a Astros Baseball Game Watch Party at Home
T-Ball Game Day Snacks Both Moms and Kids Will Love

Travel

  • Traveling on a Budget
  • Texas
  • United States
  • Mexico
  • Europe
  • Traveling With Kids

Home

  • Entertaining At Home
  • DIY
  • Marriage
  • Parenting

Recipes

  • Appetizers
  • Salads
  • Sides
  • Meals
  • Desserts

About

  • Mission
  • Subscribe
  • Press
  • Contact
  • Instagram
  • Facebook
  • Pinterest
  • YouTube
  • Twitter
Copyright © 2020 The Hurried Hostess | PRIVACY | COOKIES
  • Juliet Pro by LyraThemes.com
This website uses cookies to improve your experience. We'll assume you're ok with this, but you can opt-out if you wish. Cookie settingsACCEPT
Privacy & Cookies Policy

Privacy Overview

This website uses cookies to improve your experience while you navigate through the website. Out of these cookies, the cookies that are categorized as necessary are stored on your browser as they are essential for the working of basic functionalities of the website. We also use third-party cookies that help us analyze and understand how you use this website. These cookies will be stored in your browser only with your consent. You also have the option to opt-out of these cookies. But opting out of some of these cookies may have an effect on your browsing experience.
Necessary
Always Enabled
Necessary cookies are absolutely essential for the website to function properly. This category only includes cookies that ensures basic functionalities and security features of the website. These cookies do not store any personal information.
Non-necessary
Any cookies that may not be particularly necessary for the website to function and is used specifically to collect user personal data via analytics, ads, other embedded contents are termed as non-necessary cookies. It is mandatory to procure user consent prior to running these cookies on your website.
SAVE & ACCEPT